• Proprioception is the body’s ability to recognise and distinguish its position and motion of its limbs without looking at it. This ability is facilitated with the help of certain specialized receptors located in your muscles, tendons, joints, and inner ears. These receptors continuously send information to your brain. The information thus collected, allows your brain to create a map of your body’s location and movements in relation to its surroundings.

    How Proprioception affects your fitness

    Now, think of proprioception as your body’s internal GPS system. It helps you navigate through your surroundings, maintain balance while walking or standing, and adjust your movements based on the terrain. Without effective proprioception, simple tasks like walking up stairs or even standing upright can become challenging.

    When it comes to staying fit and healthy, people usually focus on things like strength, endurance, and flexibility. But there’s another important thing called proprioception that often gets overlooked. Proprioception helps you stay balanced, stable, and coordinated. 

    5 Proprioception Exercises to Enhance Balance and Stability:

    Improved proprioception not only reduces the risk of injuries during workouts but also elevates performance in sports, ensuring precise movements and better control over the body’s actions. In essence, integrating proprioceptive exercises into a fitness regime not only nurtures physical well-being but also empowers individuals to move confidently and efficiently, both in the gym and in everyday life.

    Incorporating proprioception exercises into your fitness routine can yield remarkable benefits. Here are five exercises that can help you improve your balance and proprioceptive abilities:

    Certainly, let’s delve deeper into each of the proprioception exercises you’ve mentioned and understand how they work to enhance balance and coordination:

    1. Single-Leg Balance:

    This exercise might seem simple, but it’s highly effective for improving proprioception. With the single-leg balance, you are challenging your body to maintain stability and balance. The key is to keep a straight posture, engaging your core muscles., as this challenges your proprioceptors further. 

     Single-Leg Balance - Proprioception
    • First, start by standing on one leg,
    • Focusing on a stable point in front of you helps anchor your gaze and aids in balance maintenance. 
    • As you progress, aim to extend the duration you can hold the pose.
    • Alternatively, standing on an unstable surface like a foam pad adds an extra layer of difficulty, forcing your body to adapt and fine-tune its balancing response.
    • To take it up a notch, close your eyes – this removes visual input, increasing your reliance on proprioceptive feedback.  

    2. Bosu Ball Squats:

    Secondly, the Bosu ball introduces an element of instability to squats. By standing on the flat side of the Bosu ball, your body needs to constantly adjust to maintain balance. This exercise not only strengthens your lower body but also sharpens your balance and coordination skills.

    Bosu Ball Squats
    1. Here, stand  on the flat side of the Bosu ball.
    2. Initiate the squat by bending your hips and knees simultaneously.
    3. As you descend into the squat, your body will need to adjust to the Bosu ball’s instability. Focus on engaging your core muscles to maintain balance.
    4. Maintain your center of gravity and properly distribute your weight between both feet.
    5. Return to the beginning position by pushing through your heels.
    6. Exhale as you lift, maintaining control over your movement.
    7. If you’re new to squats on a Bosu ball, start with a lower number of reps and gradually increase as your balance improves.

    3. Lateral Lunges with Medicine Ball:

    Thirdly, incorporating a medicine ball into lateral lunges adds complexity to the movement. By holding the ball at chest height, you challenge your proprioceptive system to adapt to the extra weight. The exercise also addresses functional fitness.

    Lateral Lunges with Medicine Ball - proprioception
    1. Hold the medicine ball close to your chest, keeping your elbows pointed outward. This is your starting position.
    2. Take a lateral (sideways) step to your right. As you step, simultaneously push your hips back and bend your right knee.
    3. Lower your body down into a lunge position on your right side. Your left leg remains extended.
    4. Keep your chest lifted, and ensure that your right knee does not extend beyond your right toes.
    5. The medicine ball should remain close to your chest throughout the movement.
    6. Push off your right foot to return to the starting position in an upright stance.
    7. Perform the same lateral lunge movement to your left side.
    8. Repeat the required number of repetitions on each side. Aim for balanced repetitions to work both sides equally.

    4. Balance Board Activities:

    Next, using a balance board or wobble board introduces dynamic instability. When you perform exercises like squats, lunges, or push-ups on these boards, your body constantly adjusts to maintain stability. The shifting nature of the board forces your proprioceptors into action. Over time, this can lead to improved joint stability and muscle control.

    1. Stand on the balance board with your feet hip-width apart.
    2. Keep your knees slightly bent and your core engaged.
    3. Maintain good posture with your shoulders back and your gaze forward.
    4. Start by trying to find your balance on the board. The board will naturally tilt in different directions as you stand on it.
    5. Focus on keeping your weight centered and distributing it evenly between both feet.
    6. Use your core muscles to stabilize your body and prevent excessive tilting.
    7. Once you’re comfortable, lower your body into a squat by bending your hips and knees.
    8. As you squat down, the board will tilt, challenging your balance. Maintain stability by using your core.
    9. Rise back up to the starting position by pushing through your heels.
    10. Perform forward or lateral lunges on the balance board.
    11. Take a step forward or to the side while keeping your balance on the moving surface.
    12. Lower into the lunge by bending your knees, maintaining good form and stability.
    13. Experiment with variations to keep the challenge level appropriate for your fitness level.

    5. Crossover Steps for Improved Proprioception: 

    Finally, crossover steps are a fantastic way to challenge your coordination and proprioception simultaneously. This exercise requires your brain to process and relay information rapidly, enhancing your ability to adjust your movements based on proprioceptive feedback. As you become more proficient, you can increase the speed and complexity of the pattern, further challenging your coordination.

    Crossover steps for improved proprioception
    1. Place small markers on the floor to create a zigzag pattern. These markers can be small cones, pieces of tape, or any easily visible objects.
    2. Stand at the starting point, next to the first marker, facing the direction you will be moving (diagonally).
    3. Begin by taking a step diagonally forward and to the side with your right foot. Cross it over your left foot.
    4. Land on the ball of your right foot and keep your weight balanced on it.
    5. Immediately follow the first step by bringing your left foot diagonally forward and to the side, crossing it over your right foot.
    6. Continue this pattern, taking quick and deliberate steps, alternating between your right and left feet.
    7. As you cross over, keep your core engaged to maintain balance and stability.
    8. Swing your arms naturally to help with your rhythm and balance.
    9. Focus on controlling your movement and maintaining a steady pace. This exercise is about precision, not speed.
    10. Continue the crossover steps until you’ve completed the zigzag pattern, moving from one end to the other.

    These exercises target different aspects of proprioception, collectively contributing to improved balance, stability, coordination, and functional fitness. As with any fitness routine, consistency is key – over time, you’ll likely notice enhanced control over your movements and a heightened sense of body awareness.

    In Conclusion: Prioritize Your Proprioception

    In the pursuit of fitness, it’s essential to consider all facets of well-being, and proprioception should not be overlooked. Evidently, incorporating proprioception exercises into your routine can significantly enhance your balance, stability, coordination, and overall functional fitness. By fine-tuning your body’s internal GPS system, you’ll not only perform better in sports and physical activities but also reduce the risk of injuries in your daily life. So, step up to the challenge and embark on the journey to better proprioception and improved fitness.

    Read also : Cardio Workouts: Fun and Effective Exercises to Boost Fitness

  • We find ourselves in a world where fitness and well-being have become the focal point. The treadmill has become an essential fixture for individuals at all fitness levels, whether newcomers or experienced enthusiasts.

    Thanks to its convenience and adaptability, the treadmill has gained widespread popularity as a preferred option for home exercise routines. Whether you’re a seasoned athlete or just starting your fitness journey, choosing to incorporate a treadmill into your home can prove to be a prudent choice.

    However, the process of buying a treadmill goes beyond a simple purchase; it’s an investment in your health and fitness journey. With a multitude of options available, each boasting various features and capabilities, it’s essential to approach this decision with careful consideration. There are several essential factors to consider to ensure you choose the right treadmill that meets your fitness goals and lifestyle requirements. 

    This guide delves into the key aspects you should weigh before you buy a treadmill, ensuring that your choice aligns with your fitness goals and sets you on a path to success.

    1. Space and Size

    One of the first considerations when purchasing a treadmill is the available space in your home. Measure the area where you plan to place the treadmill and compare it with the dimensions of the treadmill models you are interested in. Ensure that there is ample room for the cardio fitness

    equipment and additional space for you to comfortably walk or run around it. 

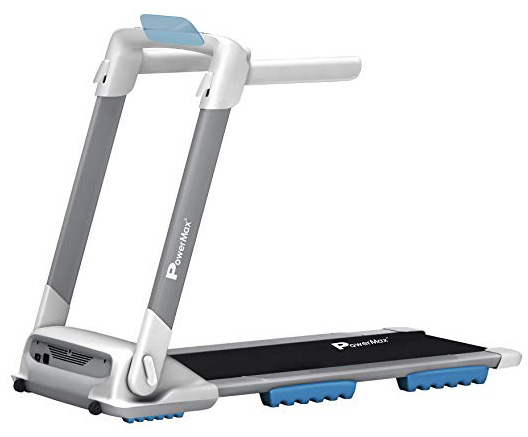
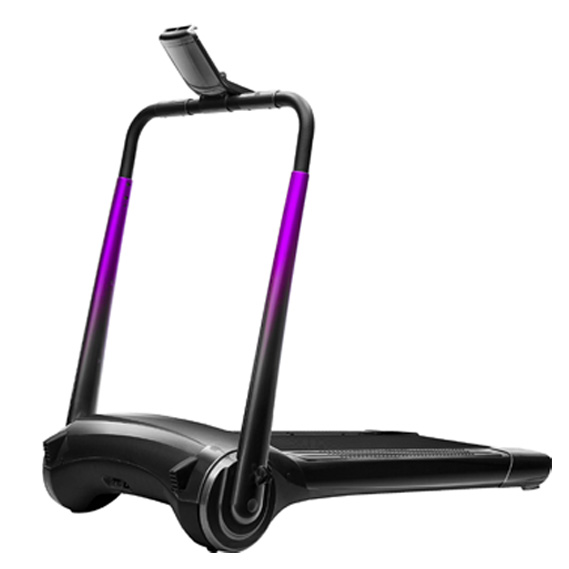
    Space-saving treadmills

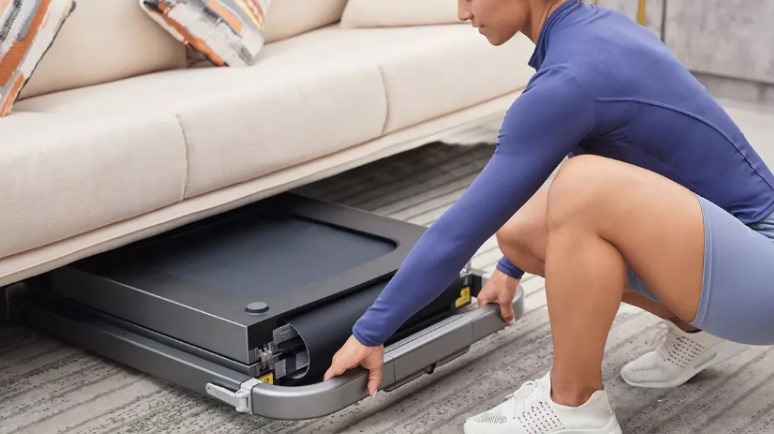
    Foldable treadmills can be a great space-saving option if you have limited space but make sure to check the dimensions when folded as well. If you struggle with a lack of room in your home, treadmills that fold up and are small enough to fit under your bed or desk are always the best choice.

    2. Budget

    Treadmills come in a wide range of prices, so it’s essential to set a budget before beginning your search. Understanding your budget guides you in selecting an affordable fitness equipment tailored to your needs, avoiding unnecessary expenses. Yet, serious runners or those desiring advanced programs may find value in investing more for enhanced capabilities.

    It’s also worth considering the long-term benefits of a quality treadmill. While you might save money upfront with a cheaper model, it may wear out quickly or lack the durability needed for consistent use. 

    3. Types of Treadmills

    There are generally three types of treadmills available: manual, motorized, and hybrid.

    Manual treadmill

    Manual treadmills are powered by the user’s movement and are more affordable but may lack advanced features. 

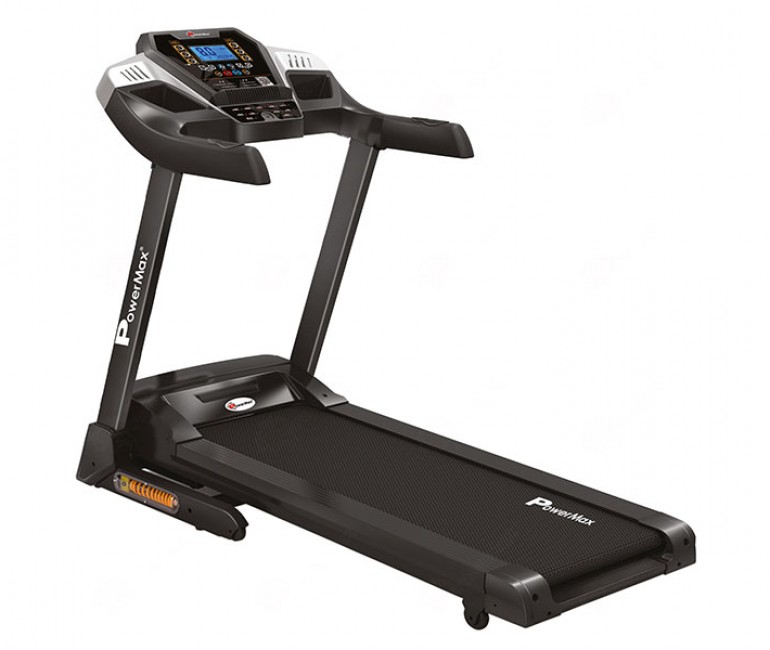
    motorized treadmill

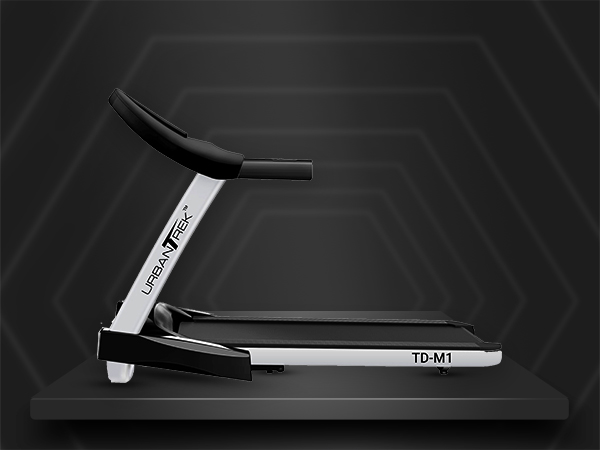
    Motorized treadmills, on the other hand, are powered by an electric motor and offer various programmable options and incline settings. 

    Hybrid treadmills are a combination of both, allowing users to switch between manual and motorized operation. Consider your fitness level, budget, and desired features when choosing the type of treadmill that best suits your needs.

    4. Weight Capacity and Durability

    Check the weight capacity before you buy treadmill to ensure it can support your body weight and intensity of workouts. A sturdy and durable frame is crucial for long-lasting performance, especially if multiple family members will be using the treadmill. Opt for a treadmill with a higher weight capacity than your current weight to allow for any potential weight changes in the future.

    5. Motor Power

    The motor is the heart of a motorized treadmill, and its power determines the treadmill’s performance. For walking and light jogging, a motor with a lower horsepower (around 1.5 to 2.5 HP) should suffice. However, if you plan on running or are a heavier user, consider a treadmill with a more powerful motor (around 2.5 to 4.0 HP). A stronger motor will ensure smooth operation and prevent excessive wear and tear.

    6. Incline and Speed Options

    incline and speed

    The ability to adjust incline and speed levels on a treadmill can significantly enhance your workouts. Incline settings simulate uphill running, targeting different muscle groups and increasing calorie burn. Look for quality fitness equipment with automatic incline adjustments and a wide range of speed settings to cater to various fitness goals.

    7. Shock Absorption

    Running or walking on a treadmill with poor shock absorption can lead to discomfort and potential injuries over time. Quality treadmills come with cushioned decks that reduce impact and protect your joints. Consider to buy treadmill with excellent shock absorption technology to make your workouts more comfortable and reduce the risk of strain on your knees and joints.

    8. Workout Programs and Connectivity

    Many modern treadmills come with pre-programmed workout routines that provide variety and challenge in your exercise regime. Some treadmills also offer connectivity features such as Bluetooth and compatibility with fitness apps, allowing you to track your progress and participate in virtual training sessions. If these features are important to you, look for a treadmill with advanced workout programs and the technology you prefer.

    9. Noise Level

    Treadmills can produce varying levels of noise during operation, and this may be a crucial factor, especially if you live in an apartment or have noise-sensitive neighbors. Quiet motors and quality construction can help reduce noise levels. Read customer reviews and consider trying out the treadmill in-store, if possible, to assess its noise level.

    10. Warranty and Customer Support

    Investing in a treadmill is a significant decision, so make sure to check the warranty offered by the manufacturer. A longer warranty period indicates the manufacturer’s confidence in the treadmill’s quality. Additionally, research the brand’s reputation for customer support, as it can make a difference if you encounter any issues or need assistance down the road after you buy the treadmill .

    Conclusion

    Choosing the right treadmill is a vital step in creating an effective and enjoyable home fitness routine. By considering factors such as space, budget, type, motor power, shock absorption, and workout programs, you can make an informed decision that aligns with your fitness goals and lifestyle. Remember to take your time, do thorough research, and read customer reviews to ensure that the treadmill you choose will be a valuable investment in your health and wellness journey. Happy treadmill hunting and best of luck on your path to a fitter and healthier you!

  • In today’s fast-paced society, sleep disorders, particularly insomnia, have become increasingly common due to constant stress, overstimulation, and a sedentary lifestyle. Medications may offer short-term relief, but a more comprehensive and sustainable solution to battle insomnia is yoga for better sleep and overall well-being.

    Yoga fosters a deep mind-body connection, promoting inner peace and tranquility. Regular practice not only improves sleep quality but also brings numerous benefits, including reduced stress, increased flexibility, and enhanced mental focus. In this article, we will explore effective yoga asanas that can alleviate insomnia and pave the way for a restful night’s sleep.

    6 Yoga Asanas for Sound Sleep:

    In the quest for a good night’s sleep and relief from insomnia, turning to the ancient practice of yoga can be a life-changing decision. Yoga, with its blend of physical postures, breathwork, and meditation, offers a path to inner peace and tranquility. Through the practice of specific asanas, or yoga poses, individuals can experience a profound release of tension, a calmness of the mind, and a deep connection with their bodies. 

    Yoga Asanas that provide relief from Insomnia

    In this section, we will explore some of the most effective asanas of yoga for better sleep that can become your allies in the journey to improved well-being. So roll out your yoga mat, breathe deeply, and allow these asanas to embrace you in their soothing embrace, leading you towards restful nights and brighter days.

    1. Child’s Pose (Balasana) – Chief Yoga Pose for Better Sleep

    Child’s Pose, also known as Balasana, is a gentle and relaxing yoga pose that is often used as a resting position during a yoga practice. It stretches the back, shoulders, and hips, while also promoting a sense of calm and relaxation. 

    Balasana- Yoga for Better Sleep

    To perform Child’s Pose (Balasana):

    • Start by being on your hands and knees, your wrists should be directly under your shoulders and your knees under your hips.
    • Take a deep breath in, and as you exhale, slowly sit back on your heels, keeping your arms extended in front of you.
    • Lower your chest towards the floor and rest your forehead on the mat.
    • Your big toes should touch, and your knees can be together or slightly apart, depending on your comfort level.
    • Relax your arms and let them rest alongside your body or keep them extended in front of you.
    • Breathe deeply and allow your body to sink into the pose, feeling a gentle stretch in your back, shoulders, and hips.
    •  Hold the pose for a few breaths or as long as you like, enjoying the sensation of relaxation.
    • To come out of the pose, walk your hands back towards your body and gently lift your torso back up into a kneeling position.

    Child’s Pose is a wonderful resting pose in yoga that helps to release tension in the back and shoulders while calming the mind. It’s a great pose to return to whenever you need a moment of rest and rejuvenation during your practice. Enjoy the soothing benefits of Child’s Pose and allow it to be a comforting pose in your yoga journey.

    2. Standing Forward Bend (Uttanasana)

    Uttanasana is a forward bending pose that promotes relaxation by gently stretching the hamstrings and lower back. As the head hangs below the heart, this pose allows for increased blood flow to the brain, reducing stress and encouraging tranquility, and hence is an ideal component of yoga for better sleep.

    Here’s how to perform Standing Forward Bend (Uttanasana):

    Uttanasana - Yoga for Better Sleep
    • Start by standing tall with your feet hip-width apart and your arms at your sides.
    • Inhale deeply, then extend your spine.
    • As you exhale, hinge at your hips and bend forward from your waist, keeping your back flat.
    • Allow your arms to hang down towards the floor or hold onto your elbows with opposite hands.
    • Keep your knees slightly bent to protect your hamstrings, especially if you have tight hamstrings.
    • Let your head droop heavily and relax your neck.
    • Engage your quadriceps to gently lift your kneecaps.
    • Breathe deeply and stay in the pose for a few breaths or as long as it feels comfortable.
    • To come out of the pose, inhale and slowly lift your torso back up to a standing position, keeping your back straight.

    Standing Forward Bend is a calming and grounding pose that stretches the hamstrings, calves, and lower back. It’s a wonderful way to release tension and relax both the body and mind. Remember to listen to your body and modify the pose as needed to suit your flexibility and comfort level. Enjoy the benefits of this pose as you surrender to the gentle flow of breath and find tranquility in the present moment.

    3. Legs-Up-the-Wall Pose (Viparita Karani)

    Viparita Karani is a restorative inversion that aids in relaxation and sleep. By elevating the legs against a wall, blood circulation improves, and the body can release built-up tension. This pose also helps reduce anxiety and fatigue, preparing the mind and body for a better night’s sleep.

    To perform Legs-Up-the-Wall Pose (Viparita Karani)

    Viparita Karani - Yoga for Better Sleep
    • Place one side of your body against a wall as you sit.
    • Lie down on your back and swing your legs up the wall, so your heels rest against it.
    • Keep your arms at your sides, relaxed, with your palms facing up.
    • Adjust your body so that your hips are slightly away from the wall, creating a small space between your lower back and the wall.
    • Close your eyes, relax your shoulders, and breathe deeply.
    • Hold the pose for 5-10 minutes or as long as you feel comfortable.
    • To come out of the pose, gently slide your legs down the wall and roll to one side.

    4. Reclining Bound Angle Pose (Supta Baddha Konasana)

    Supta Baddha Konasana is an excellent pose for opening the chest and hips. It promotes relaxation and reduces physical and emotional tension, making it an ideal choice for those struggling with insomnia. This pose can also improve breathing patterns and relieve symptoms of anxiety and depression.

    Here’s how to perform Reclining Bound Angle Pose (Supta Baddha Konasana):

    Sapta Baddha Konasana for better sleep
    • Start by sitting on the floor with your legs extended in front of you.
    • Allowing your knees to slide out to the sides, bending your knees, bring the soles of your feet together.
    • Gently lie back on the floor while supporting yourself with your elbows and forearms.
    • Slowly lower your back and head to the ground, releasing your arms to rest alongside your body.
    • Make sure your spine is straight and comfortable in the position.
    • Allow your hips to open naturally, feeling a gentle stretch in the inner thighs and groin area.
    • Relax your shoulders and let them melt into the floor.
    • You can rest your hands on your belly or keep them by your sides, palms facing up.
    • Close your eyes and take deep, slow breaths, surrendering to the pose and finding a sense of peace.
    • For as long as it seems comfortable, stay in the pose for a few breaths.
    • To come out of the pose, bring your knees together and use your hands to help you sit up slowly.

    Reclining Bound Angle Pose is a restorative pose that allows for deep relaxation and helps open the hips and groin. It’s a wonderful way to release tension and find inner tranquility. Be gentle with yourself and adjust the position as needed to ensure a comfortable stretch. Allow the breath to guide you through this pose, embracing its calming and rejuvenating benefits.

    5. Extended Puppy Pose (Uttana Shishosana)

    Uttana Shishosana is a variation of Child’s Pose that provides a gentle stretch to the spine, shoulders, and arms. It is a calming pose that relieves tension in the upper body and encourages a sense of tranquility, ideal for unwinding before bedtime.

    To perform Extended Puppy Pose (Uttana Shishosana):

    Uttana Shishosana for better sleep
    • Starting from a tabletop position on your hands and knees, place your wrists directly under your shoulders and your knees directly under your hips.
    • Walk your hands forward, a few inches in front of your shoulders.
    •   Lower your chest towards the floor, keeping your hips directly over your knees.
    • Your arms should be shoulder-width apart, and your elbows slightly lifted.
    • As you lower your chest, keep your hips high and your tailbone reaching towards the ceiling.
    • Gently lower your forehead to the mat, or if comfortable, let it rest on the floor or a yoga block.
    • Allow your chest to melt towards the floor, feeling a gentle stretch in your shoulders and spine.
    • Breathe deeply, expanding your rib cage with each inhale and relaxing on each exhale.
    • Hold the pose for a few breaths or as long as you like, maintaining a comfortable stretch.
    • To come out of the pose, walk your hands back towards your body and lift your torso back up into a tabletop position.

    Extended Puppy Pose is a variation of Child’s Pose that provides a deeper stretch for the shoulders and spine. It is a gentle backbend that promotes relaxation and releases tension in the upper body. Enjoy the benefits of this pose to open your heart and find a moment of peace and calmness in your practice.

    6 Corpse Pose (Savasana) – Concluding Yoga for Better Sleep

    Arguably the most vital part of any yoga practice, Savasana allows your body and mind to integrate the benefits of the previous poses. By lying still and consciously relaxing each part of the body, you can achieve a deep sense of peace and calm. Practicing Savasana regularly can have a profound effect on sleep quality and overall well-being.

    Here’s how to perform Corpse Pose (Savasana):

    Savasana for Better Sleep
    • Keep your arms at your sides, relaxed, with your palms facing up.
    • Keep your legs extended, slightly apart, and let your feet relax naturally to the sides.
    • Place your arms alongside your body, a few inches away from your torso, with your palms facing up.
    • Close your eyes and take a deep breath in, then exhale slowly, releasing any tension in your body.
    • Allow your entire body to relax, starting from your toes and moving all the way up to your head.
    • Soften your facial muscles, relax your jaw, and let your tongue rest gently on the roof of your mouth.
    • Bring your awareness to your breath, and let it flow naturally without any effort.
    • Stay in this pose for a few minutes, allowing yourself to completely let go and be present in the stillness.
    • To come out of the pose, gently wiggle your fingers and toes, slowly bring your awareness back to the room, and roll to one side.

    Corpse Pose is a final relaxation pose that allows your body and mind to absorb the benefits of the yoga practice. It’s a moment of stillness and surrender, offering a profound sense of peace and rejuvenation. Embrace the tranquility of Savasana and use it to connect with your inner self, leaving you feeling refreshed and ready to take on the rest of the day.

    Sleep Well, Live Well: Embrace Yoga for Better Sleep now!

    Insomnia can wreak havoc on our physical health, emotional well-being, and overall quality of life. Incorporating a regular yoga practice with the above-mentioned asanas can be a transformative step toward overcoming sleep disturbances. However, remember that consistency and patience are key. 

    Sleep Well, Live Well: Embrace Yoga for Better Sleep now

    The benefits of yoga extend beyond the mat, fostering a deeper connection with oneself and the world around us. In addition to practicing yoga, maintaining a balanced lifestyle, limiting screen time, and cultivating a peaceful sleep environment will further aid in resolving insomnia. Additionally, engaging in cardiovascular activities like running or walking on treadmills can further enhance sleep quality. These exercises trigger melatonin release, the sleep hormone, leading to more sound sleep. With dedication and mindfulness, the path to restful sleep can be within reach, allowing you to wake up each morning feeling refreshed and ready to embrace the day.

    Keyphrase: Yoga for better sleep
    Meta description: Explore 6 tranquil asanas to calm your mind and body. Embrace these asanas of yoga for better sleep such as Balasana, Uttanasana, Viparita Kar… Read more!

  • Treadmills have become an omnipresent sight in gyms and homes and one of the best fitness equipment. They offer a convenient and effective way to stay fit. With the ever-rising popularity of Treadmills in the fitness domain, there have also arisen some common myths about treadmills. The importance of looking after one’s health has been increasing over the years. Though most people wish to stay fit, some aren’t able to completely utilize the marvel that is- a treadmill- to its potential due to common misconceptions they have about treadmills

    It is imperative to bust these myths about treadmills and move past them in order to take complete advantage of the benefits of a treadmill and hoist your fitness to the next level. 

    Myths about treadmills busted

    This article will help you take charge of your fitness as we debunk common treadmill myths to shed light on the reality behind the misconceptions and wield it for your betterment.

    From concerns about joint impact to the belief that treadmills are monotonous, we will unravel the truth and provide a clearer understanding of why treadmills remain a valuable tool in achieving fitness goals. 

    Let’s separate fact from fiction and discover the truth behind these treadmill myths.

    Myth 1: Treadmills are Only for Running

    While running is a popular form of exercise on treadmills, these machines offer a versatile platform for a wide range of workouts.

    Walking, brisk walking, jogging, hill climbs, interval training, and even strength training exercises like lunges and squats can be performed effectively on a treadmill.

    Treadmills aren't only for running

    Some treadmills also come equipped with incline and decline options, simulating uphill and downhill terrains, which can intensify your workout and engage different muscle groups. This flexibility makes treadmills suitable for people of various fitness levels and exercise preferences.

    Myth 2: Treadmills are Boring and Monotonous

    One of the most prevalent myths about treadmills is that they are dull and repetitive. 

    While it’s true that running or walking on a treadmill can lack the scenery of an outdoor workout, modern treadmills come equipped with a variety of features to keep users engaged. Many models now include interactive displays with virtual courses, fitness apps, and entertainment options, making the experience more enjoyable and engaging.

    Moreover, using a treadmill indoors provides a controlled environment, which can be advantageous in extreme weather conditions, ensuring you can maintain your exercise routine regardless of external factors.

    Myth 3: Holding Onto the Treadmill Handrails is Safe

    One of the most dangerous misconceptions is that holding onto the treadmill handrails provides additional support and stability during the workout. 

    In reality, this habit can compromise your posture, reduce calorie burn, and increase the risk of injury.

    Holding onto the treadmill isn't safe

    When using a treadmill, it is essential to maintain proper form by swinging your arms naturally and engaging your core for balance. This will not only help you burn more calories but also reduce strain on your upper body and promote a more efficient workout.

    Myth 4: Treadmills are Hard on the Joints

    Concerns about the impact on joints while using a treadmill are commonly cited as a reason to avoid this fitness equipment. However, treadmills are designed to provide cushioning and shock absorption to reduce the impact on your joints compared to running on concrete or asphalt outdoors.

    Furthermore, many modern treadmills have adjustable cushioning systems that allow users to customize the level of shock absorption according to their comfort and joint health. By choosing the right treadmill and using proper footwear, the risk of joint discomfort can be minimized, making it a safe and effective option for many individuals.

    Myth 5: Treadmills are Less Effective than Outdoor Running

    Comparing treadmill running to outdoor running is a common debate, and some believe that outdoor running is more effective. 

    However, research has shown that treadmill running can offer similar cardiovascular benefits and calorie burn as outdoor running, provided you set the treadmill to a 1% incline.

    Treadmills aren't less effective than running outdoors

    Treadmills also provide a consistent surface and pace, making it easier to maintain a steady workout, whereas outdoor running might be impacted by changes in terrain and weather conditions. Ultimately, the effectiveness of running on a treadmill or outdoors depends on individual preference and fitness goals.

    Myth 6: Treadmills are Expensive and Require High Maintenance

    While high-end treadmills can be pricey, there are plenty of budget-friendly options available that still offer quality workouts and essential features. Additionally, investing in a treadmill can be cost-effective in the long run, as it eliminates the need for a gym membership and allows you to exercise at your convenience.

    As for maintenance, regular cleaning and simple treadmill care are usually sufficient to keep the machine in good working condition. Lubricating the belt, tightening screws, and wiping down the console are simple tasks that can extend the life of your treadmill without significant effort or expense.

    Myth 7: Working out on a Treadmill Alone is a Complete Workout

    yoga as an alternate form of exercise

    Many people believe that running or walking on a treadmill for a certain amount of time is all they need to maintain good health and fitness. 

    However, this perception is a myth. While treadmills can be a valuable tool in your fitness routine, relying solely on them for exercise may lead to imbalances and limitations. 

    Working out on a treadmill alone does not allow you to reach the crest of good health nor is it a complete workout. Discover alternate forms of workout such as cycling, strength training, yoga, etc. to achieve a more well-rounded fitness regimen.

    Myth 8: Treadmills are Not Suitable for Older Adults

    One of the chief myths about treadmills is that treadmills are not appropriate for older adults, as they might be too strenuous or risky. However, when used correctly and with proper supervision, treadmills can be an excellent fitness tool for seniors.

    Moderate walking or gentle jogging on a treadmill can provide numerous health benefits for older individuals, such as improving cardiovascular health, maintaining joint flexibility, and enhancing overall mobility. Treadmills offer a controlled and stable surface, reducing the risk of falls and injuries that might occur outdoors.

    For older adults who may have balance issues or difficulty with regular outdoor walking, the handrails on treadmills can provide additional support and confidence during workouts. Seniors can start at a comfortable pace and gradually increase their intensity as they build strength and stamina.

    Conclusion

    Treadmills have become an essential fitness tool for countless individuals seeking a convenient and effective way to exercise indoors. By debunking the common myths about treadmills, we can better appreciate their benefits and make informed decisions about incorporating them into our fitness routines.

    Myths about treadmills debunked

    Remember that like any home fitness equipment, using treadmills safely and effectively requires proper form. By debunking the myths about treadmills can use the fitness equipment to its complete capacity. Remember to understand its features, and listen to your body’s needs. Whether you prefer the controlled environment of a treadmill or the open roads of outdoor running, the key is to find an exercise routine that you enjoy and can stick to in the long run for a healthier and happier lifestyle.

  • When it comes to shedding those extra pounds and achieving your weight loss goals, a treadmill can be your trusty ally. With its convenience and versatility, a treadmill allows you to engage in effective workouts even within a tight schedule. In this blog, we present the best 20-minute treadmill workout for weight loss that will boost your metabolism, burn calories, and help you on your journey to.

    1. HIIT (High-Intensity Interval Training) Workout:

    HIIT Workout for weight loss

    High-Intensity Interval Training is a proven method for burning fat and increasing cardiovascular fitness. The basic principle of HIIT is to push your body to work at maximum effort during the intense intervals, followed by a short recovery period to allow your heart rate to come down. 

    This cycle is repeated several times within a workout session, typically lasting anywhere from 10 to 30 minutes, making it ideal for people with busy schedules who may struggle to find time for longer workouts.

     Here’s a simple 20-minute HIIT treadmill workout:

    • Warm up with a brisk walk for 3 minutes.
    • Sprint at maximum effort for 30 seconds.
    • Recover with a slow walk or jog for 1 minute.
    • Repeat the sprint and recovery intervals for a total of 5 sets.
    • Cool down with an easy walk for 2 minutes.

    2. Incline Intervals:

    Incorporating incline into your treadmill workout engages more muscles and burns additional calories.  By adjusting the incline levels, you can simulate walking or running uphill, which significantly increases the effort required from your lower body muscles and cardiovascular system.

    This workout focuses on varying incline levels to challenge your body:

    • Begin with a 3-minute warm-up at a comfortable walking pace.
    • Set the incline to 5% and walk at a brisk pace for 2 minutes.
    • Increase the incline to 10% and walk for 1 minute.
    • Lower the incline back to 0% and jog or walk briskly for 2 minutes.
    • Repeat the incline intervals for one more round.
    • Cool down with a 2-minute easy walk.

    3. Pyramid Run:

    Pyramid run treadmill workout for weight loss

    The pyramid run is a treadmill workout that involves gradually increasing and then decreasing the intensity in a pyramid-like fashion. This type of workout keeps your body guessing by constantly changing the challenge level, which can lead to greater calorie burn and fitness gains. The pyramid run is an effective way to add variety to your treadmill workouts and prevent plateauing.

    • Warm up with a 4-minute jog at a moderate pace.
    • Increase the speed every minute for the next 5 minutes until you reach your maximum running speed.
    • Decrease the speed every minute for the next 5 minutes, gradually returning to your starting pace.
    • Finish the workout by running at your starting pace for one more minute.
    • Cool down with a 2-minute walk at an easy pace.

    4. Steady-State Endurance:

    Steady-state cardio helps burn calories consistently throughout your workout, making it ideal for weight loss.

    Whether you’re walking, jogging, cycling, or using a cardio machine like an elliptical or rowing machine, the key is to keep your heart rate elevated at a comfortable and consistent level throughout the workout.

    • Warm up with a 5-minute walk or light jog to get your heart rate up.
    • Run at a steady pace that challenges you for 18 minutes.
    • Aim to maintain the same speed throughout the workout.
    • Cool down with a 2-minute slow walk.

    5. Power Walking Circuit:

    Power-walking circuit workout for weight loss

    This workout combines brisk walking with bodyweight exercises to target multiple muscle groups and boost your metabolism. The power walking form of exercise is characterized by continuous, rhythmic movements that elevate your heart rate to a moderate level and keep it relatively stable throughout the workout. 

    • Warm up with a 3-minute brisk walk.
    • Stop the treadmill and perform 10 squats.
    • Resume walking and increase the speed for 3 minutes.
    • Stop the treadmill again and do 10 push-ups.
    • Continue alternating between brisk walking and bodyweight exercises for lunges, tricep dips, and planks.
    • Finish with a 2-minute cool-down walk.

    Embrace the Journey to a Fitter and Healthier You!

    Incorporating these best 20-minute treadmill workout into your fitness routine will rev up your weight loss journey. Remember to stay consistent, challenge yourself, and listen to your body. Combine this series of workout for weight loss with a balanced diet, adequate hydration, and sufficient rest to optimize your results. Always consult with a healthcare professional before starting any new exercise program, especially if you have any pre-existing health conditions. With dedication and determination, you can achieve your weight loss goals and embrace a healthier, more active lifestyle.

  • In the ever-evolving world of fitness, there is a constant search for effective and time-efficient workout routines. One such routine that has gained popularity in recent years is the 12-3-30 treadmill workout. Created by social media influencer Lauren Giraldo, this simple yet effective workout promises to deliver impressive results in just 30 minutes. In this blog post, we will delve into the details of the 12-3-30 workout, its benefits, and how you can incorporate it into your fitness routine.

    What is the 12-3-30 Workout?

    The 12-3-30 workout is a cardiovascular routine that combines walking on an incline, specifically a treadmill, with specific time and speed parameters. 

    The workout gets its name from the three key components: 12% incline, 3 mph speed, and 30 minutes duration. This unique combination is designed to elevate your heart rate, burn calories, and improve overall fitness.

    Benefits of the 12-3-30 Workout

    1. Time efficiency: 

    The 12-3-30 workout is perfect for those with a busy lifestyle. With just 30 minutes, you can get a complete cardiovascular workout that effectively burns calories and strengthens your cardiovascular system.

    2. Lower impact:

     Unlike high-intensity workouts that put stress on your joints and muscles, the 12-3-30 workout is low-impact. The incline and moderate speed reduce the impact on your knees and ankles, making it suitable

    for people of various fitness levels.

    Lower-impact treadmill workout

    3. Calorie burning: 

    Walking on an incline and maintaining a speed of 3 mph can significantly increase your calorie burn. The combination of incline and speed forces your body to work harder, resulting in a higher calorie expenditure compared to traditional flat-surface walking.

    4. Cardiovascular health: 

    Regular participation in the 12-3-30 workout can improve your cardiovascular fitness by strengthening your heart and lungs. The elevated heart rate during the workout helps increase endurance and overall cardiovascular health.

    How to Perform the 12-3-30 Workout

    Performing the 12-3-30 workout is relatively simple, but let’s delve into each step to provide you with a more comprehensive understanding of the process:

    1. Warm-up:

    Before jumping into the main workout, it’s important to warm up your muscles and prepare your body for exercise. Start with a 5-minute warm-up by walking at a comfortable pace on a flat surface. This helps increase blood flow, raises your body temperature, and loosens up your joints.

    2. Set the treadmill:

    Once you’re warmed up, it’s time to set up the treadmill to the specific parameters of the 12-3-30 workout. Adjust the incline to 12% and the speed to 3 mph. This combination of incline and speed is crucial for the effectiveness of the workout.

    3. Start walking:

    starting the 12-3-30 treadmill workout with walking

    Step onto the treadmill and begin walking at the set incline and speed. As you start, focus on maintaining good posture by standing tall with your shoulders relaxed and your gaze straight ahead. Engage your core muscles to stabilize your body throughout the workout. Take smooth strides, landing on your heel and rolling through to your toes.

    4. Monitor your heart rate:

    If you have a heart rate monitor, it can be helpful to keep an eye on your heart rate during the workout. The goal is to elevate your heart rate to a moderate level without pushing it to the extreme. This ensures you’re getting a cardiovascular workout without overexerting yourself. Aim for a heart rate that allows you to carry on a conversation comfortably while still feeling challenged.

    5. Duration:

    The prescribed duration for the 12-3-30 workout is 30 minutes. Walk at the set incline and speed for the entire duration. As you progress and build endurance, you can gradually increase the duration of the workout. However, 30 minutes is a good starting point for most individuals.

    6. Cooldown:

    Cooldown after 12-3-30 treadmill workout

    After completing the 30-minute workout, it’s important to cool down and allow your body to gradually transition back to a resting state. Spend 5 minutes walking at a slower pace, gradually reducing the speed. This cooldown period helps lower your heart rate, prevents dizziness, and promotes proper recovery.

    Remember to listen to your body throughout the workout. If you experience any discomfort or excessive fatigue, it’s essential to adjust the intensity or consult with a fitness professional.

    Incorporating the 12-3-30 Workout into Your Fitness Routine 

    The 12-3-30 workout can be easily incorporated into your existing fitness routine or used as a standalone workout. Here are a few ways you can integrate it:

    1. Standalone workout: 

    If you’re short on time or looking for a quick but effective workout, the treadmill workout routine is perfect on its own. Simply set aside 30 minutes and commit to performing the workout several times a week.

    2. Cardiovascular training: 

    Use the 12-3-30 workout as a part of your cardiovascular training regimen. Alternate it with other forms of cardio exercises like cycling or swimming to keep your workouts varied and engaging.

    3. Active recovery: 

    Active recovery from 12-3-30 treadmill workout

    On your rest days or days when you want to give your body a break from intense workouts, the 12-3-30 routine can serve as a gentle yet effective active recovery workout.

    Embrace the 12-3-30 Workout and Walk Towards a Healthier You!

    The 12-3-30 workout has gained popularity for its simplicity, efficiency, and effectiveness. By combining incline walking with specific time and speed parameters, this routine offers numerous benefits, including calorie burning, cardiovascular health improvement, and time efficiency. Whether you’re a fitness enthusiast or a beginner looking to kick-start your fitness journey, the 12-3-30 workout is worth considering. So, lace up your shoes, hop on a treadmill, and start walking your way to a healthier and fitter you with the 12-3-30 workout.

  • Creating a home gym setup allows you to bring the convenience and flexibility of a fitness facility right into the comfort of your own home. Whether you’re an avid fitness enthusiast or simply looking to incorporate more physical activity into your routine, a well-designed home gym can provide the perfect environment for achieving your fitness goals.

    home gym

    Designing the perfect home gym requires thoughtful planning, considering factors such as available space, budget, and the types of workouts you enjoy. From strength training to cardiovascular exercises and functional training, a comprehensive setup will cater to all aspects of your fitness routine.

    A carefully selected range of equipment forms the foundation of your home gym. Strength training essentials like power racks, barbells, and dumbbells offer versatility and the opportunity to challenge your muscles. Cardiovascular equipment such as treadmills, exercise bikes, rowing machines, and ellipticals provide options for heart-pumping workouts. Functional training equipment, like resistance bands, medicine balls, kettlebells, and suspension trainers, add variety and help improve functional strength and mobility.

    Essential Tips for Designing Your Perfect Home Gym Setup

    Let’s dive into some valuable tips to help you design the perfect home gym setup. Following these suggestions, you can create a fitness sanctuary that meets your specific needs, maximizes your space, and aligns with your fitness goals. Whether you’re a seasoned athlete or a beginner taking the first steps toward a healthier lifestyle, these tips will guide you in crafting an ideal workout space. Let’s get started!

    1. Space Planning:

    space planning for home gym

     It is essential to first evaluate the available space and allocate a dedicated area for your home gym. Ensure there is enough room for equipment, exercise movements, and proper ventilation. Avoid cramming all your gear into a compact space.

    2. Flooring:

    Choose a suitable flooring option to provide cushioning, stability, and protection.

    rubber mat for home gym

    Rubber mats, interlocking foam tiles, or specialized gym flooring are good options. This will keep injuries or harm to a minimum.

    3. Strength Training Equipment:

    While shortlisting the training equipment that your home gym will encompass, it is important to keep in mind your fitness goals. Here’s a list of strength equipment that you can introduce to your home gym.

        – Power rack or squat rack: 

           Allows for various compound exercises like squats, bench presses, and pull-ups.

       – Barbell and weights: 

          A versatile tool for various strength training exercises.

    dumbbells

       – Dumbbells or adjustable dumbbells: 

          Provide flexibility and a wide range of exercise options.

       – Adjustable bench: 

           Enables incline, decline, and flat bench exercises.

    4. Cardiovascular Equipment:

    treadmill

       – Treadmill: 

          Ideal for running, walking, and cardio workouts.

       – Exercise bike: 

          Offers low-impact cardio and interval training options.

       – Rowing machine: 

          Engages multiple muscle groups for a full-body workout.

       – Elliptical trainer: 

          Provides low-impact cardio and full-body workout.

    5. Functional Training Equipment:

       – Resistance bands:

    resistance bands

         Versatile and portable for resistance training and stretching exercises.

       – Medicine ball: 

        Suitable for core training, rotational exercises, and explosive movements.

      – Kettlebells: 

       Allows for dynamic movements and functional strength training.

       – Suspension trainer (e.g., TRX): 

        Uses body weight for a wide range of exercises.

    6. Additional Equipment:

       – Yoga mat: 

         For yoga, stretching, or floor exercises.

       – Foam roller:

    foam roller for home gym

         Helps with self-massage and muscle recovery.

       – Mirror: 

        Useful for checking form and technique during exercises.

       – Sound system: 

          Enjoy motivational music or workout videos.

    7. Must-Have Safety Gear for your Home Gym :

    To ensure the best possible outcome for your home gym routine, safety gear cannot be overlooked. Here are the essential accessories you must inculcate in your fitness equipment.

       – Weightlifting belt: 

         Provides back support during heavy lifts.

       – Weightlifting gloves: 

         Offers grip support and protection.

       – Gym flooring or crash mats:

          Cushions the floor and reduces impact during heavy lifting.

       – First aid kit:

    first aid kit for home gym

     Essential for any minor injuries or accidents.

    Tips to Enhance Your Perfect Home Gym Setup

    1. Assess Your Fitness Goals: 

    Determine your specific objectives, whether it’s building strength, improving cardiovascular fitness, or enhancing flexibility. This will guide your equipment choices and layout.

    2. Prioritize Essential Equipment: 

    Invest in high-quality, versatile equipment that aligns with your goals. Start with foundational items like a power rack, barbell, weights, or treadmill, and gradually expand your collection.

    3. Consider Multi-Functional Equipment: 

    Maximize space and versatility by choosing equipment that can serve multiple purposes. For example, adjustable dumbbells or a bench with different incline settings.

    4. Personalize the Atmosphere: 

    Enhance motivation by adding elements that inspire you, such as motivational quotes, uplifting artwork, or a sound system to play energizing music or workout playlists.

    5. Seek Professional Guidance Before Setting Up your Home Gym: 

    If you’re unsure about designing your home gym, consult a fitness professional or a personal trainer who can offer insights tailored to your goals and help optimize your setup.

    Creating Your Fitness Sanctuary: Embrace the Possibilities of Your Perfect Home Gym

    home gym

    Remember, your home gym can be a reflection of your personality and fitness aspirations. Continuously evaluate and adapt your setup as your needs evolve. By creating a space that encourages consistency and enjoyment, you’ll be well on your way to achieving your fitness objectives and living a healthier, more active lifestyle. Embrace the possibilities, and let your perfect home gym become a sanctuary for your well-being.

  • How treadmill workouts can make you look aesthetically fit?

    Let’s face it: Jogging on a treadmill is one of the most tedious cardio exercises there is.

    But many of us frequently engage in such tedium activity, especially in the winter, and wish that time would somehow move more quickly.

    The treadmill is among the most widely used pieces of gym equipment, despite its reputation as a soul-gasping human hamster wheel.

    It is a useful training tool for both marathon runners and newbie joggers and it also helps you look aesthetically fit if done right.

    One of the best indoor cardiovascular exercises for improving metabolism long after the activity is complete and burning more calories.

    It is also a very versatile machine with a wide range of series.

    The treadmill may be used for more than simply interval sprints and endurance runs that get your muscles moving while also energizing you to get going.

    There’s an old phrase that says “you have to move differently if you want different things.”

    With that in mind, the activities listed below will further improve your physique and make you look more attractive.

    Note: Please exercise with the utmost caution while doing these complex movements!

    1. Weighted Walking Lunges On The treadmill
    Weighted Walking Lunges On The treadmill

    Grab a set of weights that weighs around 5 or 10 pounds and start walking slowly after setting the treadmill to a comfortable speed—we advise starting no faster than half your usual walking pace.

    Take a big step forward with your right foot while holding the dumbbells in each hand, then lower into a lunge while keeping the knee in line with the second toe.

    Returning to your starting posture, take a quick step forward with your left foot while lowering into the subsequent lunge. Lunges can be performed 10 to 15 times reputation to a series of 3 – 4 working sets.

    Concerned with the weights?

    Try modifying the walking lunge by placing your hands on your hips.

    1. Butt Kicks
    Butt Kicks

    Reposition yourself so that you are facing forward on the treadmill belt, and increase the speed just a little bit above your typical power-walking speed.

    As soon as you’re at ease, kick the right foot back as close to your buttocks as far as you can while concentrating on using your glute and hamstring muscles.

    Alternatively, continue with your left foot.

    Continue with alternating buttocks kick for 30 seconds while remaining light on your toes, maintaining a tall posture, and keeping your core tight.

    1. Side Shuffle
    Side Shuffle

    Face the right side of the treadmill with both feet on the belt and continue your modest walking speed.

    Slowly pick up the pace until it is just a bit faster than you normally walk.

    Use your left foot to take a step to the left.

    Quickly hop to the right foot, then quickly step to the left with the left foot.

    Once it is comfortable to maintain a constant side shuffle, slowly adjust the speed.

    Don’t worry if you feel a little behind because these will be slower than the side shuffles you would conduct across the gym floor.

    After 30 seconds, switch directions, slow down the belt to your normal walking pace, and then repeat.

    If you feel unstable, slow the speed to a walk and perform controlled side steps instead.

    1. High-Knee Skip

    Go from walking to skipping with the belt while maintaining your normal power-walking pace. Once you’ve settled into a comfortable tempo, speed things up: As you push off with the left foot and maintain a tall posture and tight core, drive your right knee towards your chest while jumping as high (and as controlled) as you can. Continually lower yourself and push off with your right foot while driving your left knee toward your chest. Alternate continuously for 30 seconds. Start by merely skipping if you’re not quite ready to get on a treadmill.

    1. Jump Squat

    Limit the speed of the treadmill belt to no more than half of your typical walking pace. At the front of the treadmill, bring both feet together. Immediately drop yourself into a squat position, keeping the knees securely behind the toes. Allow the treadmill’s belt to transport you to the back of the machine, then drive through your legs to leap forward before coming back to the front in the squatting posture. Continue until you have made 10 to 15 jumps. Reduce the treadmill’s pace if you feel the slightest bit unsteady.

    SIMPLICITY IS ALWAYS SUSTAINABLE

    Additionally, experimenting with different routines, adhering to a diet, getting some fresh air, remaining hydrated, consuming a lot of fruits and vegetables, and lavishing yourself with attention will help you develop an attractive figure.

    Despite how hard you work, your body needs rest to recuperate and create new muscles.

    At that time, the major body is constructed.

  • Do you feel exceptionally lazy in winter when you just want to crawl under the blanket and hibernate? If yes, then you are not alone. This is very common & science says that there’s nothing wrong with you. You have not suddenly become lazy. This laziness is due to the cold weather outside. 

    5 Reasons why a treadmill is to go for this winter season

    We are living in a time when it’s hard to find the motivation to work out on a normal sunny day. Now, in the winter there’s an added element of winter laziness which is due to less sunlight & cold winds. This makes it even harder to go for a run or a walk. That’s the reason why most people just quit their workouts and give up on their workout goals.

    If you are a beginner who’s looking to lose weight, how do you continue your workouts in winter? There are 2 options in front of you: You try to swim against the tide and go out and work out in the cold weather and try to be consistent or You can work out in the comfort of your home.

    Do you want to fight an uphill battle or do you want to make it easier on yourself and build a conducive environment to aid your workout? The choice is up to you.

    If you made the smart choice in winter and decided to work out from home, a treadmill is your best friend. Just like you do with a best friend you can hang out on your treadmill. It becomes your workout partner as well and gives you the necessary push to nudge you forward and hit your goals.

    We’ve brought to you the 5 reasons why a treadmill is your best friend in winter. Here we go:

    1. It’s too cold outside

    It’s too cold outside

    Working out and running outside is a hard activity in itself if you are a beginner trying to make it a part of your routine. If you add to that the cold temperatures outside, it becomes almost impossible to build consistency.

    When it’s cold outside, our body takes longer than usual to warm up and start burning fat. You would have to put in extra effort to first warm up your body and then start burning calories.

    On top of that, lack of sunlight and cold winds affect your mood. You feel down and get demotivated easily.

    The best solution is to use the warmth of your house and start walking or running on your treadmill. A treadmill in your home protects you from the cold winds and keeps your body warm. To improve your mood you can play your favorite music or listen to a podcast while working out on a treadmill.

    2. Prevents catching cold 

    Due to weather changes, many people experience a common cold and cough in winter. In winter, the weather becomes unpredictable. It rains sometimes, it’s sunny sometimes and sometimes it’s freezing. These changes in temperature negatively affect your body and cause a common cold.

    Now, another bad thing about catching a cold is we are forced to take a break from our workouts until we get better. This further demotivates us and causes unnecessary breaks while spoiling our health.

    When you work out on a treadmill, the exercise will help you improve your immunity. You will obviously not catch a cold and also build up your immune system in the process. 

    So, there will be no breaks for your workouts and you will happily improve your health while hitting your fitness goals

    3. Gives you flexibility

    Gives you flexibility

    Many people who are working in an office usually go for walks early in the morning or in the evening. This works well in summer but gets incredibly difficult in winter and rainy seasons. 

    As we know, the temperatures get colder during the early hours of the day and in the evenings after sunset. This causes many office goers to try and find a time when they can walk without having to face the cold weather.

    Having a treadmill brings you the flexibility to work out anytime. If you missed a workout in the morning, you can go for it in the evening and vice versa. 

    4. Decreases the chances of injury

    Decreases the chances of injury

    Another problem with running in winter is the roads can be slippery. Due to the cold temperatures, there’s a small amount of moisture that builds up at night. Even if there’s slight rain, the track gets slippery and it increases the chances of injury.

    There can also be potential injuries and muscle pulls because of the longer duration to warm up the body.

    To avoid bad injuries due to slippery tracks, it’s better to stay indoors and use the treadmill. Many treadmills have shock absorbers and anti-slip running belts to prevent injuries. 

    5. Maintains a steady pace

     Maintains a steady pace

    Muscles are usually less mechanically efficient in cold weather. This results in getting tired very easily. It is estimated that the usual pace of walkers and runners decreases significantly when they exercise in cold weather. This affects the intensity of your workout and you also experience fatigue after exercising for a very little duration.

    A treadmill is very helpful in this scenario as it maintains a steady pace throughout the workout.

    So, these were our 5 reasons why a treadmill can be your best friend in winter. We hope this article has helped you become more informed in tackling the hindrances to your workouts in winter. If you still want to go outside in winter to work out make sure you get the right gear and avoid injuries.

  • Prior to hopping on the best treadmill determination, consider your fitness objectives. next, the budget. Budget and utilizing a treadmill can be a standout amongst the most sensible health choices you can make. Coming up next are essential tips to ensure you maximize your investment and achieve your objectives.


    • Consider your goals
    • Research, Research and Research
    • Where you can purchase the equipment
    • Services – Before and after the purchase
    • Authorized treadmill provider
    • Shock absorption system
    • Electronic Features
    • Motor & custom program
    • Ease of Use & Maintenance
    • Safety features


    Here are the Best Treadmills of 2018 in India


    Product Program Max. User Weight Motor

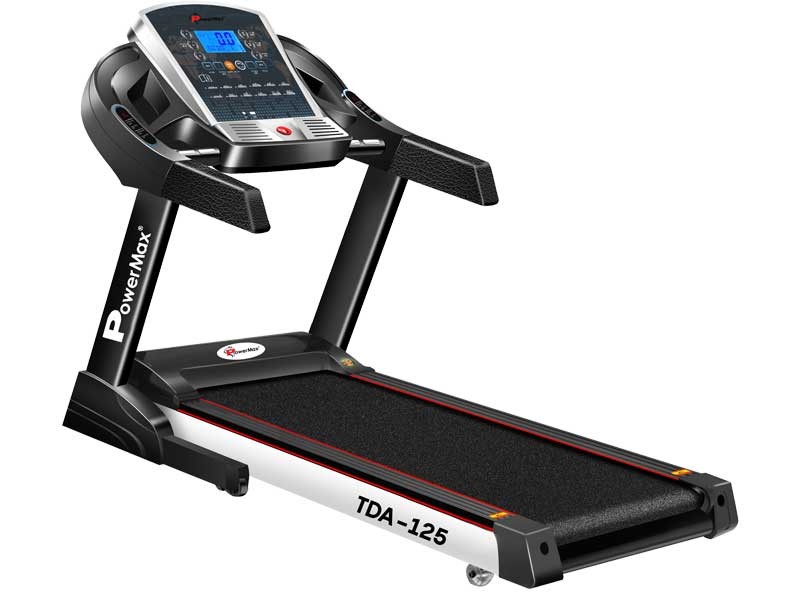
    TDA-125® Motorised Treadmill

    12 Pre-set workout programs & 3 target based modes

    115kg

    2.0 HP DC Green Efficient Motor


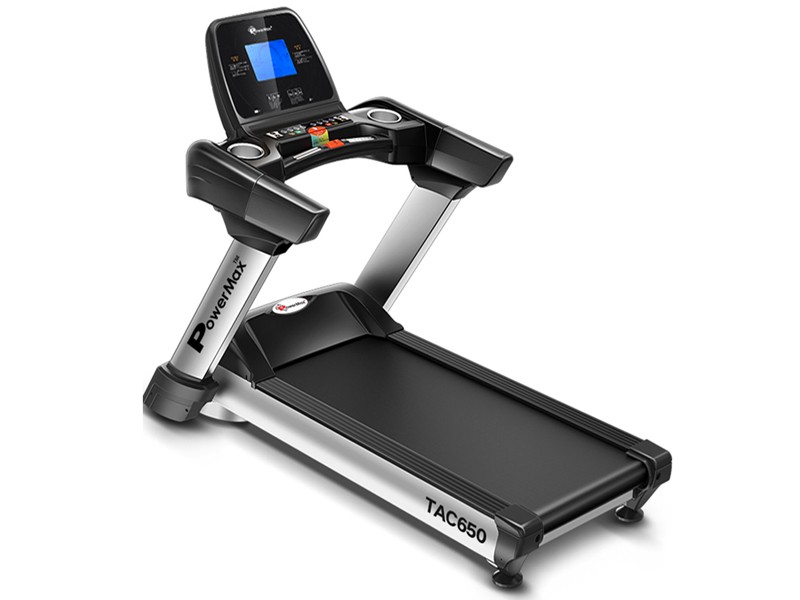
    TAC-650® Motorized Treadmill


    12 programs with HRC Healing Function


    200kg


    5.0 HP AC motor


    Urban Trek TD-M4 MotorisedUrban Trek TD-M4 Motorised


    3 Pre-set programs for efficient workout & 3 target based modes


    100 kg


    2.0 HP HiTorque DC lammer motor


    UrbanTrek™ TD-M2 MotorizedUrbanTrek TD-M2 Motorized


    3 Modes & 3 Pre-set Programs


    100kg


    2.5 HP


    TDM-110S® Motorized Treadmill 12 Pre-set workout programs & 3 target based modes 115kg 2.0 HP DC motor


    Let’s have a look in deep –


    TDA-125® Motorised Treadmill with Auto Lubrication

    Motor – 2.0 HP DC Green Efficient Motor


    Incline – Take your workout to a whole new level with the 18 level automatic inclination features. The Automatic Inclination is powered by a robust electric motor which provides you smooth and natural transition between different workout intensity.


    Running Surface ( L X W ) – 1260 x 420mm / 49.6 x 16.5 inches


    Run Belt – This Treadmill is also equipped with AUX input to listen music from your iPhone or MP3 player while exercising and keeps you in good mood. You can also play music by connecting an USB Pen Drive loaded with your favorite list of MP3 songs.


    Rollers – Precision-machined, steel crowned rollers with dynamic balancing keeps the belt centered and ensures smooth movement of running belt and increases life of bearings and running belt.


    Shock Absorption – Dual spring shock absorption equipped with ComfortTech™ – 6 point commercial grade damping system.


    Program – 12 Pre-set workout programs & 3 target based modes


    Speed Range – 0.8 – 14.0 km/hr Speed select hot keys


    Display – 5.5” Bright Blue LCD Display


    buy now button


    TAC-650® Motorized Treadmill

    Motor – 5.0 HP AC motor


    Incline – 0% to 18% Auto Incline


    Running Surface ( L X W ) – 20mm


    Run Belt – Multi-ply polyester satin weave with a PVC non-slip surface of 3.5mm thickness


    Rollers – Precision-machined, Steel tapered rollers keep the belt centred to reduce maintenance and noise.


    Program – 12 programs with HRC Healing Function


    Display – 7″ Bright Blue LCD window display


    Max. User Weight – 200kg

    buy now button


    Urban Trek TD-M4 Motorised 100% Pre-Installed Zero Maintenance Treadmill with Android and iPhone Application

    Urban Trek TD-M4 Motorised

    Motor – 2.0 HP HiTorque DC lammer motor


    Running Surface ( L X W ) – 1100 x 430mm / 43.3 x 16.9 inches


    Program – 3 Pre-set programs for efficient workout & 3 target based modes


    Speed Range – Speed: 1.0 to 14.0 km/h


    Display – 3-LED display – Speed, time, distance, calories and heart rate


    Max. User Weight – Max user weight: 100 kg


    Foldable – Compact space saving folding


    buy now button


    UrbanTrek™ TD-M2 Motorized, 100% Pre-Installed, Modern Style Treadmill

    UrbanTrek™ TD-M2 Motorized

    Motor – 2.5 HP


    Running Surface ( L X W ) – 120 X 40 cm


    Program – 3 Modes & 3 Pre-set Programs


    Speed Range – 1.0~12km/hour


    Display – Blue LCD Display, Pulse, Incline, Time, Speed, Distance, Calories


    Other Features – USB for charging, 90° Compact Foldable with Wheels for Easy Moving, 100% Pre-Installed. Just Plug and Play


    Max. User Weight – 100 kgs


    Warranty – 1-year parts warranty, 3 years motor replacement warranty. Lifetime frame warranty.

    buy now button


    TDM-110S® Motorized Treadmill with Semi-Auto Lubrication

    Motor – 2.0 HP DC motor


    Incline – 3 Level Manual Incline


    Running Surface ( L X W ) – 49.6 X 16.9 inch/1260 X 430mm


    Run Belt – Multi-ply urethane coated high conductivity polyester satin weave with a PVC non-slip surface of 1.8 mm thickness.


    Rollers – Steel crowned rollers, precisely machined & duly dynamic balanced.


    Shock Absorption – Dual spring shock absorption system equipped with double layer running board to reduce stress on your joints.


    Program – 2 Pre-set workout programs & 3 target based modes

    buy now button